Table of Content
Facebook
LinkedIn
X

How to Create a WordPress Website Locally on WampServer: Complete Step-by-Step Guide

Introduction

Creating a local WordPress website is an excellent way to test themes, plugins, and website functionality before going live. WampServer provides a perfect local development environment that includes Apache, MySQL, and PHP – everything you need to run WordPress on your computer. This comprehensive guide will walk you through the entire process from start to finish.

What You'll Need

  • A Windows computer
  • WampServer installed on your system
  • Internet connection to download WordPress
  • Basic text editor (we recommend Notepad++)

Step 1: Download WordPress

The first step is to get the latest version of WordPress from the official source.

  1. Navigate to the official WordPress website at wordpress.org
  2. Click the Get WordPress button to access the download page
  3. Download the latest version of WordPress (for example, version 6.8.1)
  4. Wait for the download to complete – the file will be in ZIP format

Step 2: Prepare the WordPress Files

Once you have downloaded WordPress, you need to place it in the correct directory where WampServer can access it.

  1. Locate your downloaded WordPress ZIP file (e.g., wordpress-6.8.1.zip)
  2. Copy the ZIP file to the drive where WampServer is installed (typically C:)
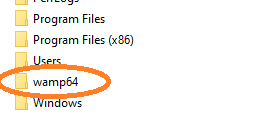
  1. Navigate to the WampServer directory: Open C:\wamp64

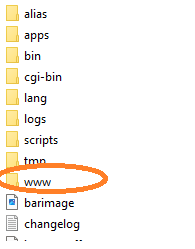
  2. Access the web directory: Go to C:\wamp64\www
  1. Place the WordPress ZIP file inside the www folder

  1. Extract the files: Right-click on the ZIP file and select “Extract Here”

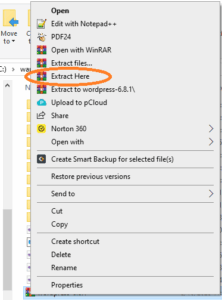
  1. Rename the folder: After extraction, you’ll see a folder named “wordpress”. Rename this folder to your desired website name (for example, “TutoWebsite”)

Tip: Choose a simple, memorable name for your local website folder as this will be part of your local URL.

Step 3: Create a MySQL Database

Your WordPress website needs a database to store all its content, settings, and user information.

1. Start WampServer if it’s not already running

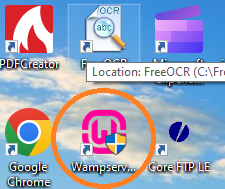
2. Access WampServer from the taskbar: Look for the WampServer icon in your system tray and click on it

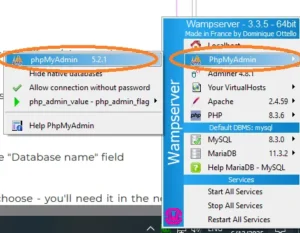
3. Open PHPMyAdmin: Select “PHPMyAdmin” from the menu, then choose the version (e.g., PHPMyAdmin 5.2.1)

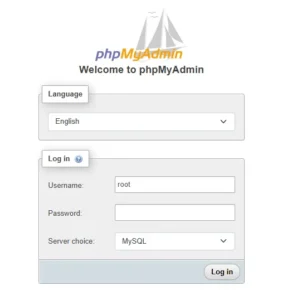
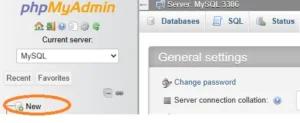
4. Login to PHPMyAdmin: You’ll be redirected to localhost/phpmyadmin/ 

  • Username: root
  • Password: Leave this field empty (no password by default)
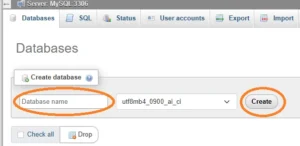
5. Create a new database

  • Click “New” in the left sidebar
  • Enter your desired database name in the “Database name” field
  • Click “Create”

Important: Remember the database name you choose – you’ll need it in the next step.

Step 4: Configure WordPress Database Connection

Now you need to tell WordPress how to connect to your newly created database.

1 . Navigate to your website folder (e.g., C:\wamp64\www\TutoWebsite)

2 . Locate the configuration file: Find the file named wp-config-sample.php

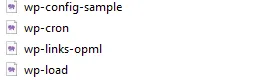
3 .Create a copy: Right-click on wp-config-sample.php and select “Copy”

4 .Rename the copy: Rename the copied file to wp-config.php (remove “-sample” from the name)

5 .Edit the configuration file: Right-click on wp-config.php and select “Edit with” your preferred text editor (Notepad++ recommended)

Database Configuration Details

 In the wp-config.php file, you need to update the database connection settings:

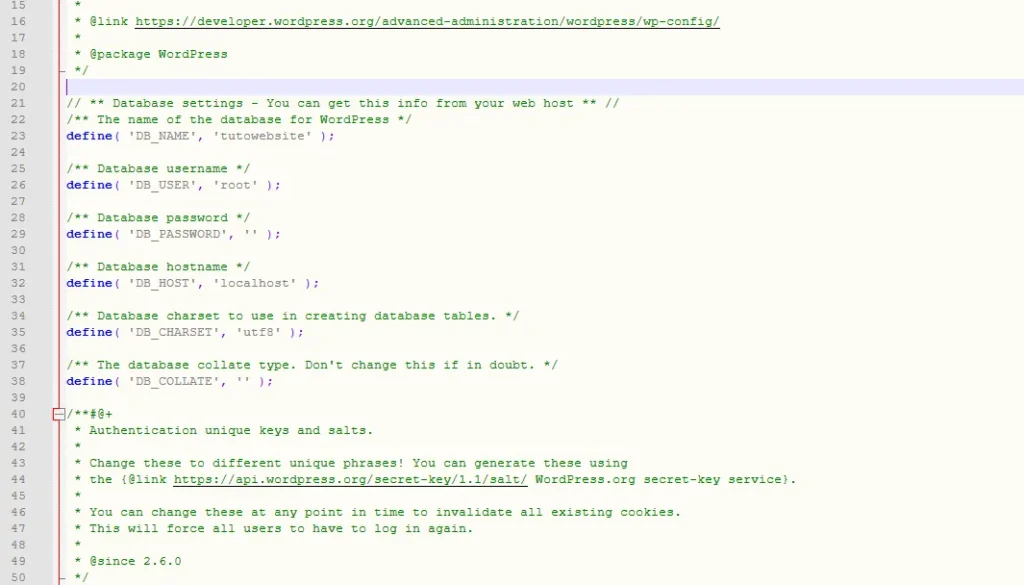
  1. Find the database name line: Look for /** The name of the database for WordPress */
  2. Update the database name: Replace ‘database_name_here’ with your actual database name (e.g., ‘tutowebsite’)
  3. Update the username: Under /** Database username */, replace ‘username_here’ with ‘root’
  4. Update the password: Under /** Database password */, remove ‘password_here’ but keep the empty quotes ”

Your database configuration should look like this:

				
					define( 'DB_NAME', 'tutowebsite' );
define( 'DB_USER', 'root' );
define( 'DB_PASSWORD', '' );


5. Save the file and close your text editor

Step 5: Run the WordPress Installation

With everything configured, you can now install WordPress through your web browser.

1 .  Open your web browser and navigate to your local website URL: localhost/yourwebsitename (e.g., localhost/tutowebsite)

2. Select your language and click “Continue”

3. Fill in the installation details:

    • Site Title: Enter the name for your website (e.g., “TutoWebsite”)
    • Username: Choose an admin username (you’ll use this to log into your website)
    • Password: You can use the auto-generated secure password or create your own
    • Your Email: Enter your email address
    • Search Engine Visibility: Check “Discourage search engines from indexing this site” since this is a local test site

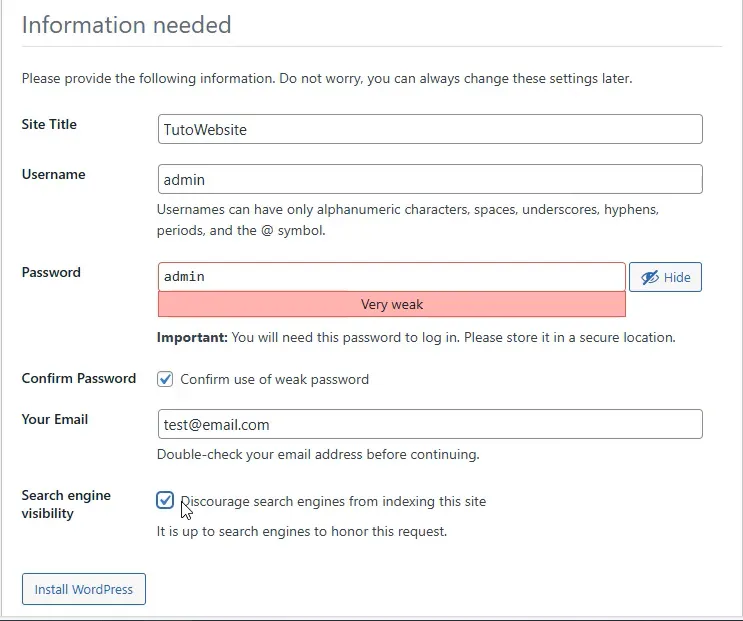
4. Click “Install WordPress” and wait for the installation to complete

Step 6: Access Your New WordPress Website

Congratulations! Your local WordPress website is now ready.

  1. Login to your website: Use the username and password you created during installation
  2. Explore the admin dashboard: You’ll be taken to the WordPress admin area where you can customize your site
  3. Visit your website: Navigate to localhost/yourwebsitename to see your live local website

What's Next?

Now that your local WordPress environment is set up, you can:

  • Install and test themes to change your website’s appearance
  • Add plugins to extend functionality
  • Create content and experiment with different layouts
  • Test website changes safely before implementing them on a live site
  • Learn WordPress development in a risk-free environment

Troubleshooting Tips

If you encounter issues during setup:

  • Ensure WampServer is running: The icon should be green in your system tray
  • Check your database connection: Verify that your database name, username, and password in wp-config.php match your PHPMyAdmin settings
  • Clear your browser cache: Sometimes cached files can cause display issues
  • Check file permissions: Make sure your WordPress files are in the correct www directory

Conclusion

Setting up a local WordPress development environment with WampServer gives you the freedom to experiment, learn, and develop without affecting a live website. This local setup is perfect for testing new themes, plugins, or practicing WordPress development skills. Remember to back up any important work, and when you’re ready to go live, you can easily migrate your local site to a web hosting provider.

Your local WordPress website is now ready for development and testing. Happy building!

You might also like