You know that feeling when you’re staring at a blank webpage, cursor blinking mockingly at you, and suddenly you realize you’ve been scrolling through WordPress themes for three hours without picking one? Yeah, I’ve been there too. But here’s the thing – what if I told you that building stunning websites doesn’t have to feel like solving a Rubik’s cube blindfolded?
Welcome to the world of Elementor, where drag-and-drop isn’t just a feature; it’s your new superpower. Whether you’re a complete beginner who thinks CSS stands for “Can’t Style Stuff” or someone who’s dabbled in web design but wants to level up, these Elementor tips and tricks will transform how you approach website building.
Picture this: You’ve just launched your WordPress website, and it looks… well, let’s be honest, pretty boring. The default theme is functional, sure, but it’s about as exciting as watching paint dry. You know your content deserves better, but the thought of installing a new theme feels like trying to solve a Rubik’s cube blindfolded.
All big websites have been there too. When you first start your WordPress journey, you can spend hours trying to figure out why your “amazing” new theme looks nothing like the demo.
But here’s the thing – installing WordPress themes doesn’t have to be rocket science. In fact, it’s surprisingly straightforward once you know the ropes. Whether you’re building a personal blog, a business website, or an online portfolio, the right theme can transform your digital presence from “meh” to “wow” in minutes.
Why Elementor Changed Everything for Beginners
Let me share a quick story. Last year, my friend Sarah – a brilliant photographer with zero coding experience – needed a portfolio website. She’d been quoted $3,000 by a developer and was considering selling her camera to afford it. Fast forward two weeks after I introduced her to Elementor, and she had created a stunning portfolio that looked like it cost ten times more than her monthly coffee budget.
That’s the magic of Elementor. It democratized web design, making it accessible to anyone willing to learn a few smart tricks.
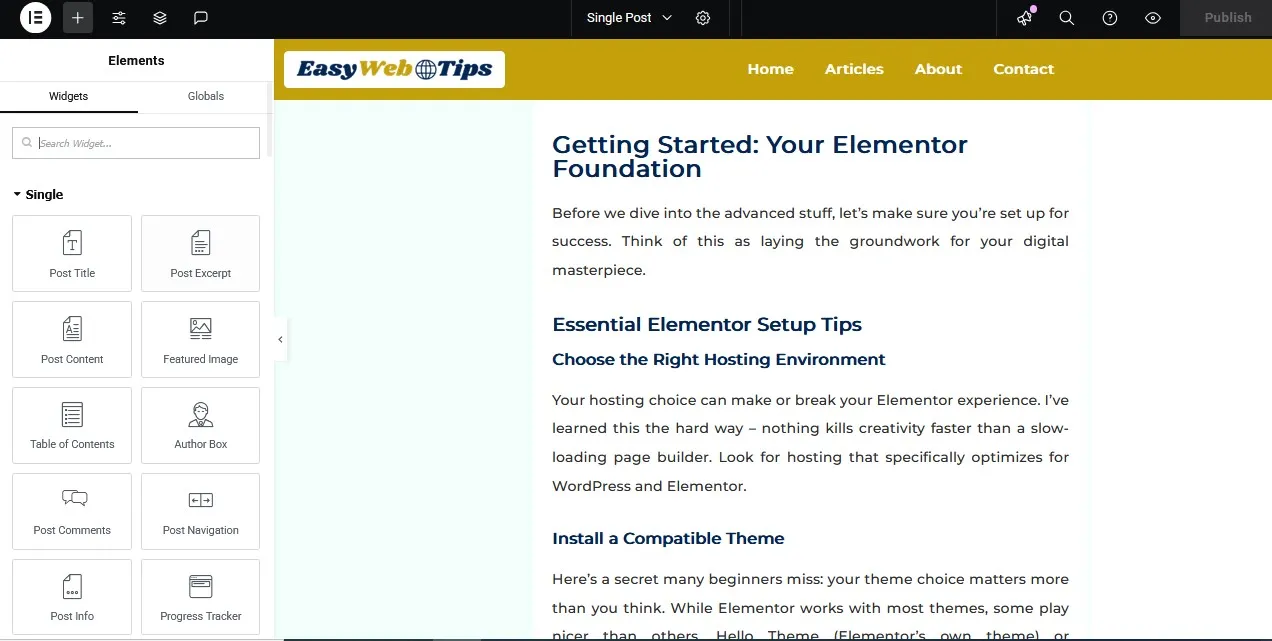
Getting Started: Your Elementor Foundation
Before we dive into the advanced stuff, let’s make sure you’re set up for success. Think of this as laying the groundwork for your digital masterpiece.
Essential Elementor Setup Tips
Choose the Right Hosting Environment
Your hosting choice can make or break your Elementor experience. I’ve learned this the hard way – nothing kills creativity faster than a slow-loading page builder. Look for hosting that specifically optimizes for WordPress and Elementor.
Install a Compatible Theme
Here’s a secret many beginners miss: your theme choice matters more than you think. While Elementor works with most themes, some play nicer than others. Hello Theme (Elementor’s own theme) or GeneratePress are fantastic starting points. They’re lightweight and won’t fight against your Elementor designs.
Configure Your Global Settings First
Before you start designing, spend ten minutes setting up your global colors, fonts, and spacing. Trust me, future you will thank present you for this organization. It’s like organizing your tools before starting a project – everything just flows better.
Speed Optimization: Making Your Site Lightning Fast
Nobody likes a slow website. Not Google, not your visitors, and definitely not your conversion rates. Here are my battle-tested Elementor speed optimization tricks that actually work.
The Image Game-Changer
Always Optimize Your Images
This is probably the biggest mistake I see beginners make. You upload a beautiful 3MB image from your phone, and suddenly your site loads like it’s 2005. Here’s what I do:
- Compress images before uploading (I use TinyPNG)
- Use WebP format when possible
- Enable lazy loading in Elementor’s settings
- Set appropriate image dimensions – don’t upload a 4K image if you only need a 300px thumbnail
Widget Wisdom
Be Strategic with Your Widgets
Not all widgets are created equal. Some are resource-hungry monsters that’ll slow your site to a crawl. Here’s my personal hierarchy:
Widget Type | Performance Impact | Best Use Cases |
Text Editor | Minimal | Content blocks, simple formatting |
Image | Low | Hero sections, galleries |
Video | High | Landing pages, testimonials |
Maps | Very High | Contact pages only |
Social Media Feeds | Very High | Use sparingly |
Pro Tip: Instead of embedding multiple social media feeds, create static mockups and link to your actual profiles. Your loading time will thank you.
CSS and JavaScript Optimization
Clean Up Your Code
Elementor generates CSS for every element, and over time, this can bloat your site. Here’s my monthly maintenance routine:
- Use a plugin like Asset CleanUp to remove unnecessary CSS/JS
- Enable Elementor’s CSS minification
- Use a caching plugin (WP Rocket or W3 Total Cache)
- Regularly clean your database
Design Mastery: Making Your Site Look Professional
Now for the fun stuff – making your website look like you hired a fancy design agency.
The Typography Secret
Master Your Font Game
Here’s something most tutorials won’t tell you: good typography can make a mediocre design look professional, while bad typography can ruin even the best layouts.
My font pairing formula:
- Headlines: Something with personality (but readable)
- Body text: Clean and simple (think Open Sans or Lato)
- Accent text: Can be decorative, but use sparingly
Typography Best Practices:
- Limit yourself to 2-3 font families maximum
- Use font weights strategically (bold for emphasis, light for elegance)
- Pay attention to line spacing – cramped text is hard to read
- Mobile-first: if it looks good on mobile, it’ll look great on desktop
Color Psychology in Action
Create Emotional Connections Through Color
Colors aren’t just pretty – they’re powerful psychological tools. Here’s my go-to color strategy:
Primary Color: This is your brand’s personality
- Blue: Trust and professionalism
- Green: Growth and nature
- Red: Energy and urgency
- Purple: Luxury and creativity
Secondary Colors: These support your primary
- Use the 60-30-10 rule (60% neutral, 30% primary, 10% accent)
- Always test contrast for accessibility
- Consider color blindness in your palette choices
Spacing and Layout Psychology
The White Space Revolution
Amateur designers try to fill every pixel. Professionals know the power of emptiness. White space (or negative space) gives your content room to breathe and makes your message clearer.
My spacing system:
- Tight spacing: 10-15px for related elements
- Medium spacing: 30-50px for section separation
- Loose spacing: 80-100px+ for major section breaks
Advanced Elementor Tricks for Next-Level Results
Ready to impress? These advanced techniques will set your sites apart from the crowd.
Custom CSS for Unique Effects
Hover Animations That Don't Suck
Everyone loves a good hover effect, but most are overdone. Here are my favorite subtle animations:
/* Smooth color transition */
.my-button:hover {
background-color: #your-color;
transition: all 0.3s ease;
}
/* Gentle scale effect */
.my-image:hover {
transform: scale(1.05);
transition: transform 0.3s ease;
}
Creating Custom Shapes
Don’t limit yourself to rectangles. Use CSS clip-path to create interesting shapes:
.custom-shape {
clip-path: polygon(0 0, 100% 0, 85% 100%, 0% 100%);
}
Template Library Mastery
Building Your Own Template Collection
Here’s a workflow that’s saved me hundreds of hours: create templates for common sections. Once you’ve designed the perfect header, footer, or contact form, save it as a template. Future projects become assembly work instead of starting from scratch.
Template Categories I Always Have Ready:
- Headers (5-6 variations)
- Hero sections (different industries)
- Feature sections (3-column, 2-column, alternating)
- Testimonials (carousel, grid, single)
- Footers (simple, complex, minimal)
Responsive Design Like a Pro
The Mobile-First Mindset
Here’s where most beginners go wrong: they design for desktop first, then try to make it work on mobile. I do the opposite.
My Responsive Workflow:
- Start with mobile design
- Scale up to tablet
- Perfect the desktop version
- Test everything on real devices
Responsive Typography Formula:
- Mobile headlines: 24-32px
- Mobile body text: 16-18px
- Tablet headlines: 32-40px
- Desktop headlines: 40-60px+
Conversion Optimization: Turning Visitors into Customers
Beautiful design is great, but websites need to work. Here’s how to make your Elementor sites convert better.
The Psychology of Button Design
CTA Buttons That Actually Get Clicked
I’ve A/B tested dozens of button designs, and here’s what consistently works:
Color Strategy:
- Use contrasting colors that stand out
- Orange and green typically perform well
- Avoid using your brand color for CTAs (it blends in)
Text That Converts:
- “Get Started” beats “Submit”
- “Join Free” beats “Sign Up”
- “Download Now” beats “Click Here”
Size and Placement:
- Make buttons finger-friendly (minimum 44px height)
- Use plenty of white space around buttons
- Place primary CTAs above the fold
Form Optimization Secrets
Making Contact Forms That Don't Scare People Away
Nobody likes filling out forms, so make yours as painless as possible:
Field Reduction Strategy:
- Only ask for what you absolutely need
- Use smart defaults when possible
- Break long forms into steps
- Use progress indicators for multi-step forms
Visual Design Tips:
- Use plenty of spacing between fields
- Make error messages helpful, not angry
- Use clear, descriptive labels
- Add icons for visual interest (but don’t overdo it)
Trust Signal Implementation
Building Credibility Through Design
Trust signals are design elements that make visitors feel confident about your business. Here’s my trust signal toolkit:
Trust Signal | Where to Place | Impact Level |
Customer Reviews | Homepage, product pages | High |
Security Badges | Checkout, contact forms | High |
Professional Photos | About page, team section | Medium |
Client Logos | Homepage footer | Medium |
Social Media Links | Header/footer | Low |
Troubleshooting Common Elementor Issues
Let’s face it – sometimes things go wrong. Here are solutions to the problems I see most often.
The "White Screen of Death"
When Your Page Won't Load
This usually happens when:
- Your hosting resources are maxed out
- There’s a plugin conflict
- Your theme isn’t compatible
Quick Fix Steps:
- Deactivate all plugins except Elementor
- Switch to a default theme temporarily
- Check your hosting resource usage
- Contact your host if resources are the issue
Slow Elementor Editor Loading
When the Page Builder Feels Sluggish
Performance Boosters:
- Clear Elementor cache (Elementor > Tools > Regenerate CSS)
- Optimize your database
- Check for plugin conflicts
- Increase PHP memory limit
Mobile Responsiveness Issues
When Things Look Weird on Phones
Common Culprits:
- Fixed widths instead of percentages
- Overlapping elements
- Text too small to read
- Buttons too small to tap
My Testing Routine:
- Test on actual devices, not just browser tools
- Use Elementor’s responsive mode during design
- Check common breakpoints (375px, 768px, 1024px)
Advanced Customization Techniques
Ready to push Elementor beyond its default capabilities? These techniques will make your sites truly unique.
Custom Post Type Integration
Beyond Pages and Posts
If you’re building sites for clients with specific needs (portfolios, properties, products), custom post types are game-changers.
Setting It Up:
- Use a plugin like Custom Post Type UI
- Create your custom fields with ACF (Advanced Custom Fields)
- Use Elementor Pro’s dynamic content features
- Build templates for your custom post types
API Integrations
Connecting External Services
Modern websites need to talk to other services. Here’s how I handle common integrations:
Email Marketing:
- Mailchimp: Use their official Elementor addon
- ConvertKit: Elementor Pro forms work great
- ActiveCampaign: Custom API integration
E-commerce:
- WooCommerce: Native Elementor support
- Shopify: Use Buy Button integration
- Stripe: Custom payment forms
Database Optimization
Keeping Things Running Smoothly
As your Elementor sites grow, database optimization becomes crucial:
Monthly Maintenance Checklist:
- Clear unused revisions
- Remove spam comments
- Optimize database tables
- Clear expired transients
- Remove unused plugins/themes
Future-Proofing Your Elementor Skills
The web design world moves fast. Here’s how to stay ahead of the curve.
Emerging Trends to Watch
What’s Coming Next:
- Voice UI Integration: Preparing sites for voice search
- AI-Powered Personalization: Dynamic content based on user behavior
- Micro-Interactions: Subtle animations that guide user behavior
- Dark Mode Design: Creating themes that adapt to user preferences
Continuous Learning Resources
Staying Sharp:
- Follow Elementor’s official blog and YouTube channel
- Join Facebook groups (Elementor Community, WP Speed Matters)
- Practice with weekly design challenges
- Experiment with new widgets and features regularly
Building Your Elementor Business
Turning Skills into Income:
If you’re getting good at this, why not monetize your skills?
Service Options:
- Website design packages
- Elementor template creation
- Speed optimization services
- Training and consultation
Pricing Strategy:
- Basic websites: $500-1,500
- Custom designs: $1,500-5,000
- Template packs: $20-100
- Hourly consultation: $50-150
Wrapping Up: Your Elementor Journey Continues
Here’s the truth about mastering Elementor – it’s not about learning every single feature. It’s about understanding the fundamentals, then building on them consistently.
You don’t need to be a coding wizard or have a design degree. You just need to be willing to experiment, make mistakes, and learn from them. Every professional designer started exactly where you are right now.
Remember Sarah, my photographer friend from the beginning? She’s now building websites for other creatives and making more from web design than photography. Not because she’s naturally gifted at design, but because she applied these principles consistently.
Your Next Steps:
Start small. Pick one technique from this guide and master it before moving to the next. Build something, even if it’s just a practice page. Share your work and get feedback. Most importantly, keep building.
The web needs more thoughtful, well-designed sites. With these Elementor tips and tricks in your toolkit, you’re ready to create them.
What’s your next Elementor project going to be? Drop a comment below and let me know – I’d love to see what you create!
Ready to dive deeper? Check out our advanced Elementor course where we cover everything from custom PHP integration to building your own widgets. Because once you master these basics, the only limit is your imagination.