Picture this: You’ve just launched your WordPress website, and it looks… well, let’s be honest, pretty boring. The default theme is functional, sure, but it’s about as exciting as watching paint dry. You know your content deserves better, but the thought of installing a new theme feels like trying to solve a Rubik’s cube blindfolded.
All big websites have been there too. When you first start your WordPress journey, you can spend hours trying to figure out why your “amazing” new theme looks nothing like the demo.
But here’s the thing – installing WordPress themes doesn’t have to be rocket science. In fact, it’s surprisingly straightforward once you know the ropes. Whether you’re building a personal blog, a business website, or an online portfolio, the right theme can transform your digital presence from “meh” to “wow” in minutes.
What Exactly Are WordPress Themes?
Think of WordPress themes as the wardrobe for your website. Just like how you wouldn’t wear a tuxedo to the beach or flip-flops to a board meeting, your website needs the right “outfit” to match its purpose and personality.
A WordPress theme is essentially a collection of files that determine how your website looks and functions. It controls everything from colors and fonts to layout and navigation. The beauty of themes is that they separate your content from your design, meaning you can completely change your site’s appearance without losing any of your precious blog posts or pages.
Why Should You Care About Installing Themes Properly?
Here’s where many beginners stumble. Installing a theme incorrectly can lead to:
- Broken websites that look like they were designed in the Stone Age
- Lost customizations that took hours to perfect
- Security vulnerabilities that hackers love to exploit
- Poor performance that makes visitors bounce faster than a rubber ball
I learned this the hard way when I accidentally deleted my entire site’s customizations. Don’t be like past me – let’s do this right from the start.
The Three Ways to Install WordPress Themes
Method 1: The WordPress Dashboard (The Easiest Route)
This is your best friend as a beginner. It’s like having a personal assistant who handles all the technical stuff while you focus on the fun parts.
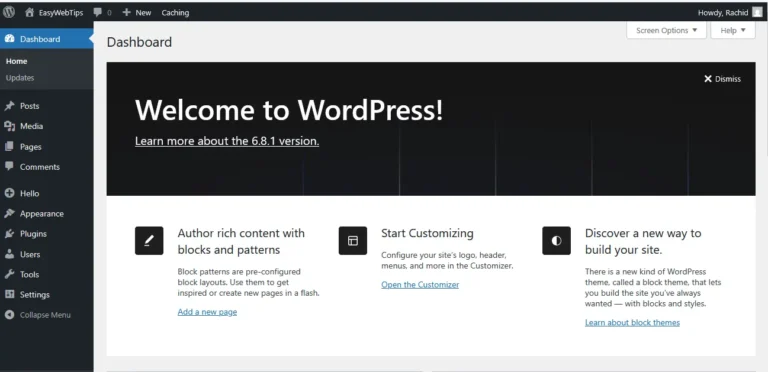
Step 1: Navigate to Your Theme Section
- Log into your WordPress admin dashboard
- Click on “Appearance” in the left sidebar
- Select “Themes”
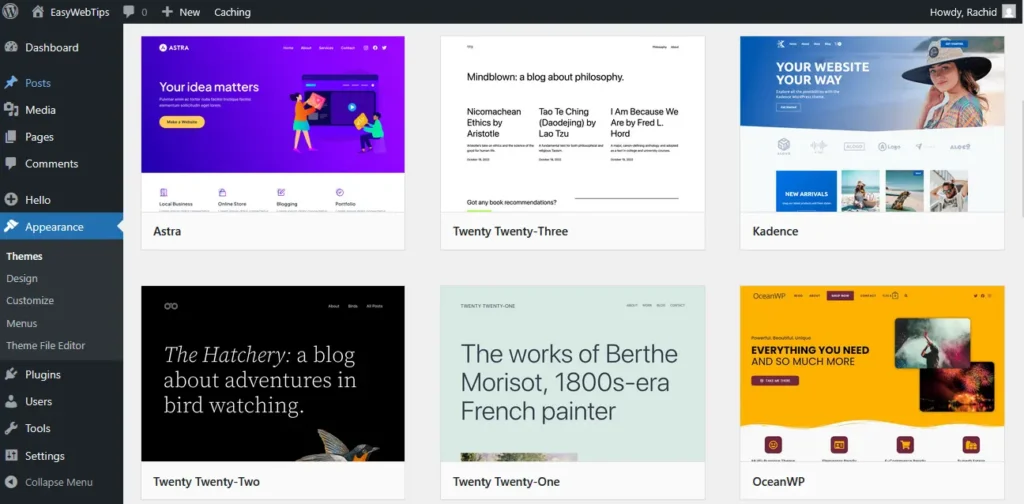
Step 2: Find Your Perfect Theme
- Click “Add New” at the top of the page
- Browse through thousands of free themes
- Use the search bar to find specific styles (minimalist, photography, business, etc.)
- Filter by features like grid layout, custom header, or translation-ready
Step 3: Preview Before You Commit
- Hover over any theme that catches your eye
- Click “Preview” to see how it looks with your content
- Don’t worry – previewing won’t change your live site
Step 4: Install and Activate
- Click “Install” on your chosen theme
- Wait for the installation to complete (usually takes 30 seconds)
- Click “Activate” to make it live
Pro Tip: Always preview themes before installing. What looks stunning in the demo might not work with your content type or color scheme.
Method 2: Upload Theme Files (For Premium Themes)
Got your hands on a premium theme? This method is your ticket to installation success.
Step 1: Download Your Theme
- Purchase and download your theme from the developer
- You’ll typically get a ZIP file – don’t unzip it yet!
Step 2: Access the Upload Option
- Go to “Appearance” → “Themes”
- Click “Add New”
- Select “Upload Theme” at the top
Step 3: Upload and Install
- Click “Choose File” and select your ZIP file
- Click “Install Now”
- Wait for the magic to happen
- Click “Activate”
Method 3: FTP Upload (For the Tech-Savvy)
This method is like taking the scenic route – more complex but gives you complete control.
When to Use This Method:
- Large theme files that won’t upload through the dashboard
- Hosting restrictions that limit file uploads
- When you want to feel like a coding wizard
Step 1: Prepare Your Files
- Unzip your theme file on your computer
- Connect to your website using an FTP client (FileZilla is popular and free)
Step 2: Upload to the Right Location
- Navigate to /wp-content/themes/ on your server
- Upload your theme folder here
The folder should contain files like style.css and index.php
Step 3: Activate Through Dashboard
- Go back to your WordPress dashboard
- Navigate to “Appearance” → “Themes”
- You’ll see your uploaded theme – click “Activate”
Common Installation Mistakes (And How to Avoid Them)
The "Oops, I Broke My Site" Syndrome
The Problem: Activating a theme that’s not compatible with your plugins or WordPress version.
The Solution: Always check theme compatibility before installation. Most reputable themes list their requirements clearly.
The "Where Did My Content Go?" Panic
The Problem: Switching themes and losing widget areas or menu locations.
The Solution: Themes handle content differently. Your posts and pages are safe, but you might need to reassign menus and widgets.
The "It Doesn't Look Like the Demo" Disappointment
The Problem: Expecting your site to look identical to the theme demo immediately.
The Solution: Demo sites use sample content, plugins, and customizations. You’ll need to configure your theme to match.
Essential Pre-Installation Checklist
Before you install any theme, run through this quick checklist:
Check | Why It Matters |
Backup your site | Safety first – you can always restore if something goes wrong |
Theme compatibility | Ensure it works with your WordPress version |
Plugin requirements | Some themes need specific plugins to function properly |
Browser testing | Check how the theme looks across different browsers |
Mobile responsiveness | Over 50% of web traffic is mobile – make sure your theme adapts |
Support and updates | Choose themes from developers who provide ongoing support |
Post-Installation: Making Your Theme Shine
Installing the theme is just the beginning. Here’s how to make it truly yours:
Customize Your Theme
- Colors: Match your brand colors or personal preferences
- Typography: Choose fonts that reflect your style and improve readability
- Layout: Adjust sidebar positions, header styles, and footer content
- Logo: Upload your custom logo to replace default branding
Import Demo Content (If Available)
Many themes offer sample content to help you get started. This includes:
- Sample posts and pages
- Pre-configured menus
- Widget setups
- Image galleries
Install Recommended Plugins
Premium themes often recommend specific plugins for enhanced functionality:
- Page builders for advanced layouts
- SEO plugins for better search visibility
- Security plugins for protection
- Backup plugins for peace of mind
Troubleshooting Common Issues
"The Theme Isn't Activating"
Possible Causes:
- Corrupted theme files
- Insufficient server permissions
- Plugin conflicts
Solutions:
- Re-download and install the theme
- Contact your hosting provider about file permissions
- Deactivate all plugins temporarily and try again
"My Site Looks Broken"
Quick Fixes:
- Clear your browser cache
- Check if required plugins are installed
- Verify theme files uploaded correctly
- Review theme documentation for setup instructions
"The Theme Is Too Slow"
Speed Optimization Tips:
- Choose lightweight themes
- Optimize images before uploading
- Use caching plugins
- Remove unused plugins and themes
Choosing the Right Theme: A Strategic Approach
Not all themes are created equal. Here’s how to pick a winner:
Consider Your Website's Purpose
- Blogs: Look for themes with strong typography and reading features
- Business sites: Professional layouts with service showcases
- Portfolios: Image-focused designs with gallery features
E-commerce: Themes optimized for online selling
Evaluate Theme Quality
Red Flags to Avoid:
- Themes that haven’t been updated in over a year
- Poor ratings or reviews
- No documentation or support
- Overly complex designs that slow down your site
Green Flags to Look For:
- Regular updates and active development
- Responsive design that works on all devices
- Clean, well-written code
- Good customer support and documentation
Free vs. Premium Themes: The Eternal Debate
Free Themes: The Good, The Bad, The Ugly
Pros:
- Cost-effective (obviously)
- Great for beginners and testing
- Often well-coded and secure
- Easy to find and install
Cons:
- Limited customization options
- Basic support (if any)
- May lack advanced features
- Can look generic
Premium Themes: Worth the Investment?
Pros:
- Extensive customization options
- Professional support
- Regular updates and security patches
- Unique designs that stand out
- Advanced features and functionality
Cons:
- Cost involved (typically $30-100)
- Can be overwhelming for beginners
- May include features you don’t need
Security Considerations When Installing Themes
Your theme choice affects your site’s security. Here’s how to stay safe:
Only Use Reputable Sources
- WordPress.org theme directory (always safe)
- Established marketplaces like ThemeForest
- Direct from developers with good reputations
- Avoid nulled or pirated themes – they often contain malware
Keep Your Themes Updated
Outdated themes are security vulnerabilities waiting to happen. Set up automatic updates when possible, or check for updates monthly.
Regular Security Audits
- Use security plugins to scan for vulnerabilities
- Remove unused themes from your site
- Monitor for suspicious activity
The Future of WordPress Themes
The WordPress theme landscape is evolving rapidly. Here’s what’s coming:
Block-Based Themes
With the rise of the Gutenberg editor, themes are becoming more modular and flexible. Block-based themes allow for:
- Easier customization without coding
- Better performance
- More consistent user experience
AI-Powered Customization
Some themes now use AI to suggest colors, layouts, and content arrangements based on your industry and preferences.
Enhanced Mobile Experience
As mobile-first indexing becomes the norm, themes are prioritizing mobile performance and user experience.
Advanced Tips for Theme Management
Create a Child Theme
This is crucial if you plan to customize your theme’s code. A child theme preserves your customizations when the parent theme updates.
Use a Staging Site
Test new themes on a staging site before applying them to your live website. This prevents disasters and allows you to perfect your setup.
Keep Theme Files Organized
- Document your customizations
- Keep backups of modified files
- Use version control if you’re comfortable with it
Conclusion: Your Theme Installation Journey Starts Now
Installing WordPress themes doesn’t have to be intimidating. Whether you choose the simple dashboard method, upload premium themes, or go the FTP route, you now have the knowledge to transform your website with confidence.
Remember, the perfect theme isn’t just about looks – it’s about finding the right balance of design, functionality, and performance that serves your audience and achieves your goals.
Start small, experiment fearlessly, and don’t be afraid to change themes as your needs evolve. Your website is a living, breathing representation of your brand or personality, and it should grow with you.
Ready to give your WordPress site the makeover it deserves?
Start by browsing the WordPress theme directory, create a backup of your current site, and take the plunge. Your future self (and your visitors) will thank you.
What theme are you planning to install? Share your thoughts in the comments below – I’d love to hear about your theme installation adventures and help troubleshoot any challenges you encounter along the way.
Additional Resources:
- WordPress Theme Directory: wordpress.org/themes
- Theme Development Best Practices
- Website Backup Solutions
- Performance Optimization Guides
Remember: The best theme is the one that serves your content and audience effectively. Happy theming!